Monday, December 31, 2012

Final Project

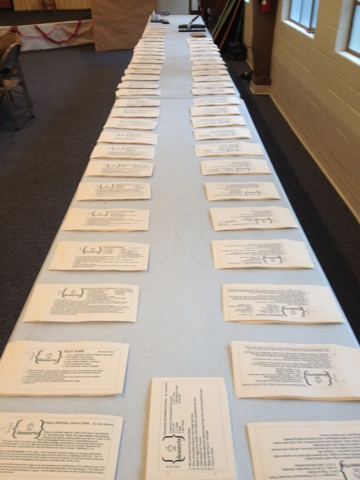
Here is the final project and complete shopping list :)


Construct the Stable:
4 Graham Crackers   1/2 Sheet-Bed
                                   3 Sheets-Stable
1 C. Powdered Sugar -Frosting
1/2 T. Wilton Meringue -Frosting
Water     for Frosting
1/2 C. Coconut- Floor

Construct People and Things:
3 Regular Marshmallows- Sheep
15 Twizzler Bites- Sheep Face and Feet 
4 Life Savers/Mints- Angel Body
1 Lifesaver/ Pineapple- Angel Halo
Paper Butterfly Punch- Angel Wings
7 Whoppers- Heads
3 Rollo Mini's- Kings Crowns
18 Candy Dots- Peoples Bodies
6 Toothpicks- Inside People
2 Jujubee Candy's- Frankincense & Mur
1/2 yellow Starburst- Gold
2/3 Fruit by the Foot- Capes and Blanket
1 Tootsie Roll- Jesus
5 Candy Canes- 4 Cradle
                   - 1 Staff

Thursday, December 27, 2012

Wise Men

Here are my wisemen
Used:
3 toothpicks- build the bodies
9 Gum Drops- Body
1 Fruit roll (cut in pieces)- Capes
3 Malt Balls- Heads
3 Rollo Mini's- Crowns
3 Jujubes (or Starbursts)- Gifts
Frosting- Building


Wednesday, December 26, 2012

The Family

Here is Mary, Joseph and baby Jesus


Used:
1/2 Graham Cracker Sheet- Bed
4 Candy Canes- Hold the Cradle
Tootsie Roll- Baby Body
1/4 Fruit by the Foot - Blanket
Frosting- Building

2 Toothpicks- build the bodies
6 Gum Drops- Body
1 Fruit roll (cut in pieces)-
Joesph- Shoulder Cover, Mary- Head Cover
2 Malt Balls- Heads
Frosting- Building

Shepherd and Sheep

Shepherd

Used:
3 Marshmallows- Sheep
15 Black Licorice Pieces- 3 Faces 12 Feet
Candy Cane- Staff
1 Toothpick- hold Body
3 Gum Drops- Body
1 Malt Ball- Head
Frosting- Building

Angel

Sorry I got a little behind with Christmas, but I will still daily (starting today) post a piece of the Nativity!
:
Used: 4 Mint Life Savers- Body
1 Coconut Life Saver- Halo
1 Malt Ball- Head
Stampin' Up! Paper Butterfly Punch- Wings
Frosting- Building

Sunday, December 23, 2012

Candy Nativity

Here is our oh so cute candy nativity.  We made this with First Baptist's Kindergarten and first grade classes.  In the end I think we questioned our sanity in making these with such active kids.  Today I will be posting some of their finished projects.  This week I will be posing the pieces of the nativity and listing what we used.  On the last day I will post mine and a full list of what is needed ;)

One for each child, All  34 :)

 DONE, DONE, DONE!!!

Friday, December 21, 2012

Card Book

I had pinned a book like this last year.  Like many projects this year it sat on a shelf until last week.  I made a simple cover with my Cricut and SU! punches and used rings to hold my book together.  I used ribbon to make it a little more fun on the edges.  I hope to have one each year starting with our first Christmas!

Thursday, December 20, 2012

Grandma


I know this is not creative but my grandma always did this with her cards, so I thought I would start it with the ones I did not hang this year.


Fun with Bows

I had so much fun making my own bows this year! It was a new adventure, but oh so fun!  They worked great and easy to pack and move to my parents on Christmas Day without getting there with a bunch of smashed bows :)

Monday, December 10, 2012

Santa Tag

Just something you can do without having to fill the cellophane bags!
Stampin' Up!
Punches: Small Tag, 2 3/8" Scallop Tag
Stamps: Tags Till Christmas

Saturday, December 8, 2012

Dec. 25

On this one I stamped the dec. 25 and then then punched it out using the matching punch (XL Deco).  Then I punched a piece of green using the same punch.  I cut that punch in half and put either half on top and bottom.  I got this original project from maybe Split Coast Stampers.  Have a great (if you live in the CA Central Valley) foggy day!!!  Happy Craftin'!
Stampin' Up!
Punches: XL Deco Label
Stamps: Tags Till Christmas

Friday, December 7, 2012

Pine Cone

Add Stampin' Up!
Punches: XL Deco Label
Stamps: Tags Till Christmas

Thursday, December 6, 2012

Homemade

Simple way to say thanks with one stamp and one punch!!!
Stampin' Up!
Punches: 2 3/8" Scallop Circle
Stamps: Homemade

Wednesday, December 5, 2012

Stocking Treat Class


All of the Stocking Treats Together

Snowman Treat

This was one created from another one I saw on Split Coast Stampers.  I love this idea for classrooms or large groups ;)
Stampin' Up!
Punches: 2 3/8 Scallop Circle, 1 3/4" Circle,
Scallop Square
Stamps: Tags Till Christmas

Monday, December 3, 2012

MDS Christmas Recipe Book

Here is our Lincoln oh so cute recipe book!  I loved how it turned out!!!  The recipe cards and card cover came from the "In My Kitchen" stamp set.  The Christmas additions came from the "First Christmas" stamp set.  I am super new to MDS but I wanted to try and see if I could make this project for our get together.  I had thrown a bridal shower a few months back and I had to hand stamp the recipe cards for each person.  At times it was hard to get the ink flat.  The other thing I LOVED about the MDS is that I could make the cards as big or small as I wanted.  This way I could take the 4x6 stamp and make it 1/2 a page.  To add a little bling to the cover I took the star from the real stamp set and and embossed it to the cover in gold.  My only suggestion to Stampin' Up! is that they add a cut and paste option.  I had to retype each recipe rather than cutting and pasting it in from each persons email.  Besides that little tip I loved it!
Cover
Inside- Recipies
Back Page

Friday, November 30, 2012

Thanks MDS

Tonight is our Women's Ministry Recipe event. I typed all of the recipes into MaDS and I was so happy with how it came out. Tomorrow I will share the book :). Have a great day!

Thursday, November 29, 2012

Ornament Keepsakes

This card was in the Stampin' Sucess July and versions all over the net.
Stampin' Up!
Stamps:Seasonal Sayings, Ornament Keepsakes
Die: Holiday Ornament Framelit

Wednesday, November 28, 2012

First Christmas

There is just something I love about the importance of the star and Jesus on this card!
Stampin' Up!
Stamps:First Christmas
Misc: Gold Embossing Powder

Tuesday, November 27, 2012

Ornament Windows

I found this fun card on Split Coast Stampers!  I had to make it.  The best part is that there are so many ways to use this card.  It could be used for holidays, birthdays and even new babies!!!
Stampin' Up!
Punches: Scallop Square
Stamps: Delightful Decorations
Die: Adorning Edglits, Lacy Brocade Folder


Monday, November 26, 2012

Heart Tree

LOVE, LOVE, LOVE this card!!!  It is so simple and so cute!  I am not sure where I saw this card but I found it somewhere on line ;)  I hope you love it too!
Stampin' Up!
Punches: Full Heart
Die: Framelit Holiday Collection

Saturday, November 24, 2012

3 Trees

This card was so simple and could be used for any card.  I started with a green card and a white front.  I punched a scallop in the white paper.  Then I attached it to the green card.  Then I stamped the Merry Christmas and attached it to the card.  Next I punched out 3 different pennants to make them into trees.  I topped it off with stumps and boxes at the bottom.
Stampin' Up!
Punches: 2 3/8" Scallop Circle, Build a Pennant
Stamps:More Merry Messages, Pennant Parade

Saturday, November 17, 2012

Christmas Card Class


Christmas Cards

Cost -$16 Monday November 19th 6:30-8:30pm @ Panera
Ok so I know you are thinking why is she making Christmas cards in November.  Well let me tell you!  I am trying to be ahead in my card making and I realize if I have a class a week before the holiday then the cards don’t get used and sent.  So I am starting early!!!  I mean who can’t use a Christmas card?  We will be making 8 different Christmas cards using so many different Christmas stamps!  This is your time to come and relax and begin to prepare for the holiday season!

Friday, November 16, 2012

Dec. 25

I can not remember exactly where I saw this card (since I saw so many different versions and colors). I just loved how simple and clean it looks. The embossed dots added perfectly to it as well :). Happy Tuesday!!!!
Stampin' Up!
Punches: XL Deco Label
Stamps:Tags Till Christmas, More Merry Messages
Die: Polka Dot folder

Framelit Fun

Wow was this card easy!!! I saw this card on to cool stampin.  All I did was emboss the front piece of brown.  Then I lined up the framelits where I wanted them.  Before I adhered the card I put scraps of color behind the shapes for fun.  The red was tied on after the card front was complete.  Then I attached the whole front and we are done!!!
Stampin' Up1
Die: Polka dot folder,
Holiday Collection Framelit


Thanksgiving M&M's

I have been subbing in a 4th grade class for the week and I wanted to do something fun for the last day before vacation for them.  I saw an idea on Pinterest and really wanted to try it.  Well lets just say it was a bust!  They tell you to wet the bottom of an ice cream cone to bend it up.  In the end I cased the idea without the bend, and added a little tag.  I guess that made up for the no bend in my cornucopia. The funny part is that when I reread the website i realized it should have been a waffle cone ;) OOPS!!!   HAVE A GREAT FRIDAY!!!

Thursday, November 15, 2012

Rudolph

Look at these cuties!  This is one of my Stocking Suffers from my class!  These are actually for my cousins kids preschool class.  I needed to start making them early so they were done.  For the first time EVER I am glad that Christmas stuff is out before Thanksgiving!  I got the owl punch idea from Pinterest.  You start with the owl and cut off his cute little feet.  The I added the other elements to make them more fun!  Hope you like them!  Starting Saturday it is all about Christmas Craftin' on my blog!!!

Stampin' Up!
Punches: Owl Builder, 2 1/2" Circle

Wednesday, November 14, 2012

Christmas Dinner


This year my aunt decided to send out Christmas cards containing the information for Christmas dinner.  This was the card she wanted for the occasion.  I love the fact that it looks like her hands are behind her back!  Have a great day!
Stampin' Up:
Punches: Butterfly, 3/4" Circle, 1/2" Circle,
Build an Owl
Stamps: More Merry Messages

Friday, November 9, 2012

Open House

If you are not doing anything on Saturday come to my craft Open House!!!
Saturday Nov. 8   10am-2pm
My place (for directions let me know)
There will be lots to do and see!!!  

Come make a a few FREE crafts ;)

Come and shop for 12x12 Scrapbooks or Single Spreads,


Fall paper flowers or banners,

Or just come to eat!!!
Hope to see you there!!!!

Thursday, November 8, 2012

Card Frame

Thanks to my friend Margaret I now have the card frame holder I wanted!  I have had two of these frames since I was in college with a poster in it.  I loved it's distressed look already so I asked my friend if she would have her husband help us make this frame so I could use it for my open house.  Well with little if any help from her husband she took out the glass and stretched chicken wire across the back and stapled it on.  She created both of them for me.  What is even better is when we found a cheep frame at Ross she was willing to make me a 3rd card frame!!!  What a great craftin' friend!!! 

Tuesday, November 6, 2012

Thanksgiving is on its way!!!

Thanksgiving is on its way!!! It is so much fun pulling out all of my fun stuff to make my house a little more like fall even though the weather does not act like it!

Monday, October 29, 2012

Chalk Board Prices

I am hosting an open house in November and wanted something small to attach to my crafts to give people the prices.  After looking around I saw an idea on Pinterest and made it my own.  I used chalk board paint and painted teh simple wooden shapes at Jo-Ann's.  Then I attached a clothes pin to the back to make it easy to attach.  I am still planning on making a few bigger ones, but this was a great simple start ;)

Saturday, October 27, 2012

Fall Flowers

I love this die cut!  I have used it for so many things lately.  I liked my fall wreath so much that I thought a few vases of theses flowers would be fun around the house after Halloween.  I made the rosettes 1 1/2" and 2" from the original die cut.  I glued them onto skewers (found out the market) to make them strong.  I thought about painting the skewers like I did for Halloween but I thought that the natural went well with the paper.  I had a bunch of scraps from the die cut so I cut and folded them into the vase to hold the skewers.  The ribbon fell right as I took the picture (go figure) but it should be in the center of the vase ;)  The best part is they will never die!!! 
Stampin' Up!
Die: Rosette

Thursday, October 25, 2012

Thanksgiving Banner

Thanksgiving Banner Class
$15.00 per banner kit
Monday October 29th   
6:30-9:30pm   Panera Stockton
Please let me know if you will be there so I can have materials ready ;)

Wednesday, October 24, 2012

Open House

I would love to see you there!!!
 

Fall Door

I love this door!  About a year ago I went to a card making day in Tracy and made a Christmas version of this card.  I am sad to say I am not sure who designed it.  I traded out the wreath and sponge colors and this is what I got!  I started with a brown card and attached a cream wood grain embossed rectangle.  Then I punched out 2 XL Decorative Labels and 2 XL Curly Label and sponged the edges with brown to add depth.  Then I stamped the wreath and punched it out with the scalloped on the edge and the circle in the center.  I used a dimensional behind three parts of the wreath to help it stand out.  I topped it off with a door knob on the side. I used a dimensional but it can also just be glued on.
Stampin' Up!
Punches: XL Decorative Label, 1 3/8" Circle, XL Curly Label,
2 3/8 Scalloped Circle, Petite Punch (circle)
Stamps: Warmest of Wishes (Retired)
Folders: Wood Grain

Tuesday, October 23, 2012

Turkey on a Limb

The original card was made at the Holiday Sourey found on Stampin' with Niki .  I have to say Turkeys are always so much fun to play with.  I took Niki's basic turkey card and added a different background and made a few other minor changes.  I love how cute and fun this turkey looks ;) The turkey is made with the owl punch with the ears cut off.  Then the the feathers are made with the blossom punch.  I love that it added a different shape to the feathers. 
Stampin 'Up!
Punches: 1 3/8" Square, 2 3/8" Circle, Blossom,
Build a Owl, Petite Punch Set (cross)
Folders: Wood Grain

Monday, October 22, 2012

Cat on the Fence

There is something that I just love bout this card!  I saw similar cards on both Niki &Pinterest.  There were things I liked on both so I merged them together.  I started with the fence.  I cut the purple using the Stampin Up! rosette die.  This gave me great even peaks on the fence.  Then I ran it through the Big Shot again to give it the wood grain effect.  Before I attached the ribbon onto the back of the fence.  Then I stamped the Frightening Feline stamp using the stayson black stamp pad.  This is a darker stamp pad and it works well on the shiny paper.  Then I used the 2 1/2" circle to cut around the cat.  I attached the circle low to make it look like the cat was sitting on the fence in the moon light!  I had a hard time decided if I wanted to use the googly eyes or not.  I decided to use them because I am sending them out to my friends with kids.   
Stampin' Up!
Punches: 2 1/2" Circle
Stamps: Frightening Feline, Seasonal Sayings (inside)
Folders: Wood Grain
Die Cut: Rosette

Saturday, October 20, 2012

Thanks for Giving

Just simple and tan!  I just framed the chevron embossed rectangle and the stamped rectangle.  I love how different the embossing makes my card.
Stampin' UP!
Stamps: Seasonal Sensations
Folder: Chevron

Thursday, October 18, 2012

Leaf Thank You

Here is just another simple thank you card.  I cased the whole card from Pinterest!  The only thing is I did not stamp on the leaves.
Stampin' UP!
Stamps: Petite Banners
Die: Autumn Accents
Folder: Wood Grain

Wednesday, October 17, 2012

Falling Leaf

I saw a similar card on Pinterest.  I wanted to make a card that was simple and here it is ;)
Stampin' UP!
Stamps: Trust God
Die: Autumn Accents
Folder: Polka Dot